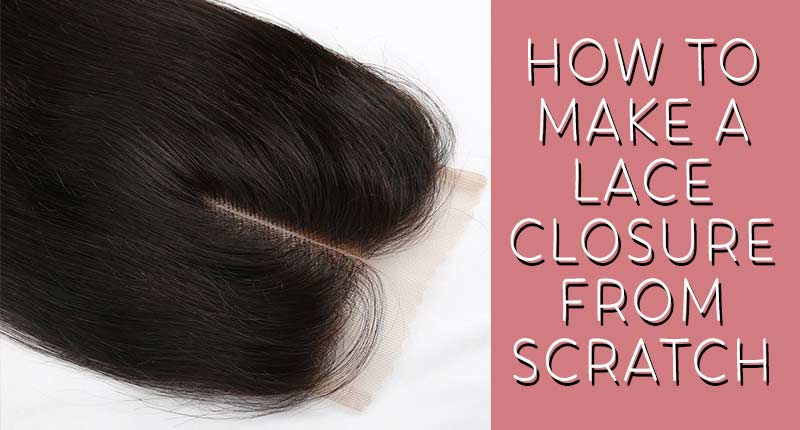
While pre-made lace closure wigs are all around the market, many wig wearers still prefer making their wigs on their owns. Still, it is not a piece of cake to start from the zero points. So, how to make a lace closure from scratch?
You might have been familiar with buying lace closure hairpieces and bundles and then combine them to make a full wig. But how about making the lace closure DIY? Making it by yourself? Never tried before, huh?
It involves several processes and requires your proper knowledge of wig making, especially hand-knotting technique. The following article from Lewigs would get you covered with what you need to do for a beautiful lace closure piece.
Table of Contents
#1 Pick the right lace material
The first and foremost thing to be done is to choose the right net for your closure piece. Some common types of lace in the market nowadays are Mono lace, French lace (what we call normal lace), transparent lace, and HD Swiss Lace.
– Mono lace: the stiffest and thus could last the longest among these 4. This net can bear high density (up to 200%). However, it is not so preferable to make frontals or closures since for such these parts, people want something that is lightweight, soft, and natural-looking.
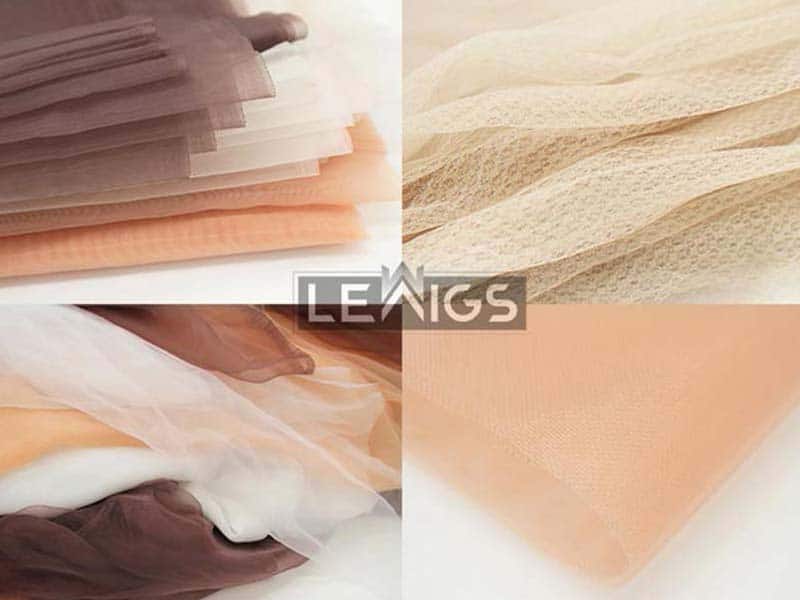
– French lace: the most common lace. It is less thick than mono, yet still thicker and more durable than transparent lace or Swiss HD Lace. If you are a newbie to wig wearing, this lace material is the best to opt for. It is easy to knot the hair onto and can work well with tape or glue adhesives without much effort.
– HD lace: the most-loved one. For those wanting an invisible front look, transparent lace is a great choice. As its name states, it offers a transparent appearance when being applied on your scalp.
– Swiss lace: The lace is ultra-thin and appears to be ultra-realistic. However, as it is soft and thin, HD Swiss lace can’t bear too heavy density. It is also easy to tear apart if you don’t know how to attach and remove it.
How about the colors? All these lace materials are available in different colors, namely white, brown, and color #3. For transparent lace, the colors are available in #4 and #7, while with Swiss lace, there is no color choice.
Similar articles:
- How To Make A Bob Wig – It’s Easy If You Do It Smart!
- This Guideline Will Show You How To Make Your Own Wigs Like A Pro
- The Secret Behind How To Make A Wig Look Real
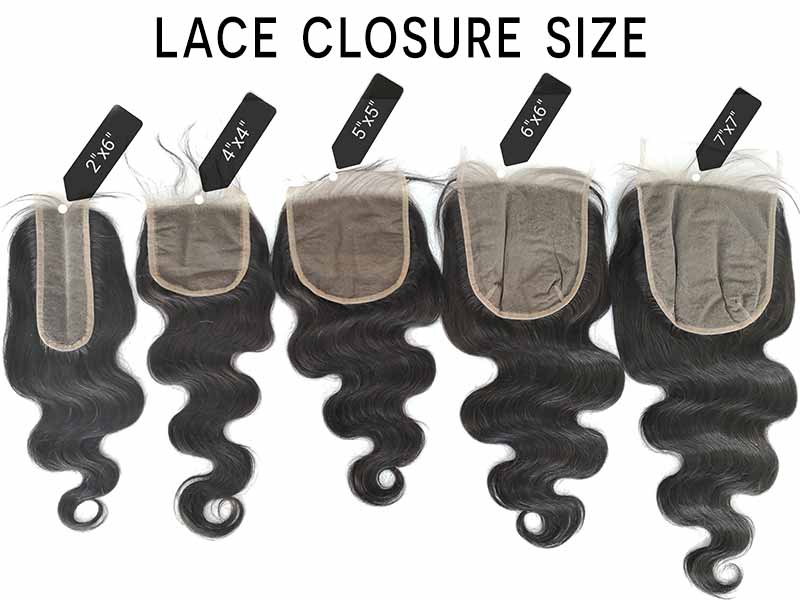
#2 Decide the size of your lace closure
As you may know, lace closure is to cover the crown of your head, where the hair parting line stays. Therefore, it’s not necessary to make it too large.
The common sizes for the lace closure are 4” x 3.5”, 4” x 4”, 4” x 5”, and 5” x 5”.
When cutting the lace, remember to leave some more space in the edges. You will need it for sewing the wefts and the like later on. You can cut it later; hence, for example, if you are about to make 4”x4”, then cut it 5”x5” for example.
Pick your right size, cut it and move to the next part on how to make a lace closure from scratch.
#3 Prepare the hair
Together with the lace, what hair you would use is also essential. We highly recommend best-quality human hair to make your lace closure from scratch. If you are white people, then use natural straight Vietnamese hair. But if you are dark-skinned, it is better to go for coarser and bouncier hair such as Cambodian hair and Brazillian hair.
For the lace closure part only, you will need around 50-70 grams of hair only. Remember to use the hair that comes in bulk, or in a ponytail. In contrast, for the other part of the wigs, machine weft hair is the best choice.
#4 Hand-knot the hair onto the lace closure
The next step to make a lace closure from scratch is to knot the hair onto the lace piece. But how to start your knot game?
Learn about the ventilating techniques first!
Hair ventilating techniques
For the lace materials, 4 common techniques are used to ventilated hair. They are single knots, single split knots, double knots, and double split knots.
– Single knots: the hair is tied onto the lace with a single knot. With this technique, the hair lays flat; therefore, it is preferable to use at the temple and the side areas of the scalp. For the frontal or the crown part, it is less favorable. Also, single knots are easy to get loose, thus the strands are likely to fall out.
– Single split knots: this technique offers better durability to the tresses. In that technique, hair strands stay half on one side and the other half on the left side. In other words, with 1 original strand, you will have 2 strands on the base. This technique, with its small knots, is favorable for the front part since it perfectly mimics the natural hairline.
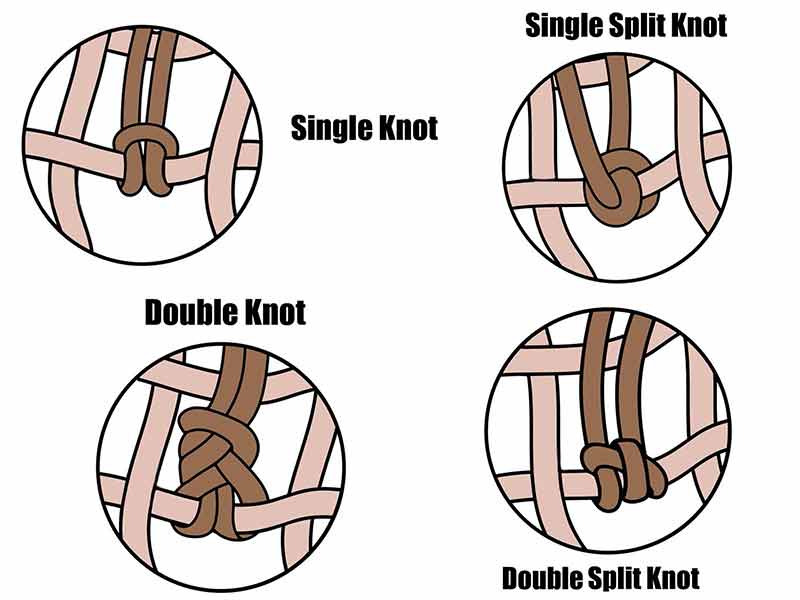
– Double knots: instead of looping once like in single knots, with double knots, it would be twice. The knots hence appear to be firmer and more durable. Also, the hair won’t lay flat but would look fuller instead. However, the knots will look apparent on the lace base.
– Double split knots: the hair strands would be reversed twice for thicker and firmer volume. It also gives flexible movements to the strands.
Hair ventilating requires a delicate touch, so be careful when knotting it. For further details into each ventilation technique, take a look at our article: 6 Ventilating Hair Technique You Must Grab Yourself With
Bleaching hair knots for an invisible look
If you don’t want the knots to be too visible, you can consider bleaching your closure. By bleaching, the knots will be hidden, thus give out an ultra-realistic lace base. But bear in mind that bleaching would make the knots weaker and later reduce the lifespan of your lace closure hairpiece.
Essential things to notice
Before knotting the strands onto the lace, it is essential to determine the hair parting line first. Do you want a middle part, left part, or right part? Or just leave it to fall freely? Or opt for the currently hot Kim K Closure part? Find what you desire in advance because once you have formed the parting line, it is super hard to adjust it if you are not a pro in this field.
Moreover, how dense do you want the hair on your hairpiece to be? It would decide how close the strands would stay on your lace closure. The normal density people often choose are 130% or 150% that look similar to the natural hair growth of young people.

#5 Combine lace closure and hair weave to make a complete wig
The final step in how to make a lace closure from scratch is to combine your already-made lace closure hairpiece and machine weft hair to form a full wig. You will sew the closure and the wefts onto a wig cap. Start with the hair weave first and then move to the closure.
However, instead of sewing them in, many people choose to glue them on. In other words, they will use a liquid adhesive to secure the hair onto the wig cap to make a lace closure wig. By this way, they would save quite an amount of time, yet the hairpiece won’t last as long as by being sewn in.
In this article, Lewigs won’t talk too deeply into this step because there have been a series of blogs from our website and other hair vendors that discuss this process.
But if you feel interested, read it on: How To Make A Wig With Lace Closure For Beginners
Read more:
- How To Make A Lace Front Wig Like A Pro
- How To Make A Hair Topper Look Natural?
- The Ultimate Guide On How To Make A Toupee DIY
Takeaways
For those wanting to make your own closure wigs without relying on any hair salons or vendors, learning how to make a lace closure from scratch is exceptionally important. Lewigs hope that our guideline today can somehow brainstorm you the way to ventilate an exquisite closure hairpiece.
Give it a try to see if it works!
If you fail at the very first tries, don’t feel down! Practice makes perfect, and your effort will bear fruit.
In case you feel it too hard, don’t worry. We’re here! Lewigs have well-designed training courses to teach you how to ventilate the hair as well as form the lace base for your wig. Furthermore, how about an excellent lace closure hairpiece at Lewigs? You can buy our pre-made lace closure and wefts and then just sew them on for a complete wig! Full closure women’s hairpieces are also available at our store. We can make the best hairpieces based on your requests in a timely manner.
Feel free to contact us via our WhatsApp hotline or email: info@lewigs.com at any time for further support.
Cheers!
