Hair extensions are no longer a stranger thing for women. There are tons of extensions types that come with different installation methods. Some are so easy to carry out while others require high skills. So what types of hair extensions you should for yourself with respect to their installing method? Below, we are going to discuss many ways on how to put in hair extensions and their own pros and cons, let’s check it out!
Table of Contents
How to apply hair extensions?
Sew-in method
The sew-in method involves using hair bundles/hair weave applied onto cornrows with the use of a needle and thread. First, plait your hair into cornrows. Then, thread the needle and start to sew hair bundles from the nape of your head and keep doing so upwards. This method requires high skill and experience so we recommend you have your hair professional install for you.
One benefit of using the sew-in method is that it is hard for your extension to slip off once you sew it into your braids. Unless the braids become loose, it will not slide off from your hair easily. This method is suitable for African American hair that is thick, coarse hair. Moreover, no heat or glue is required while applying.
One drawback of the sewing method is that it takes several hours to install. The tight braid can cause tension and headaches some times. If it is not washed properly, build-up may happen.
Jump to:
- What Are Hair Extensions? Artificial Hair Integrations Are Saving Your Life!
- Cheap Bundles Of Human Hair – How To Get Them Home
- How Long Do Hair Extensions Last? Let’s Figure It Out!
Clip-in method
This is a common extension method that is used by everyone. A clip-in extension is a hair weave that has clips attached to it. Hence, to put it on your head, just clip it into your hair and done! You may need two or three clip-ins at certain parts of your head for a fuller look.
One of the outstanding benefits of the clip-in method is that it does not take time to install. Without professional help, everyone can install and remove it easily. Hence, users can change hairstyles and colors in the way you want at home. This method is perfect for short-term users.
On the other hand, the clip-in method requires wearers to remove it frequently such as before going to bed. Wear many clip-ins can two or three clip-ins around certain parts of your head to give you a fuller look. Besides, this method is not an ideal one for those who want to wear extensions for long.
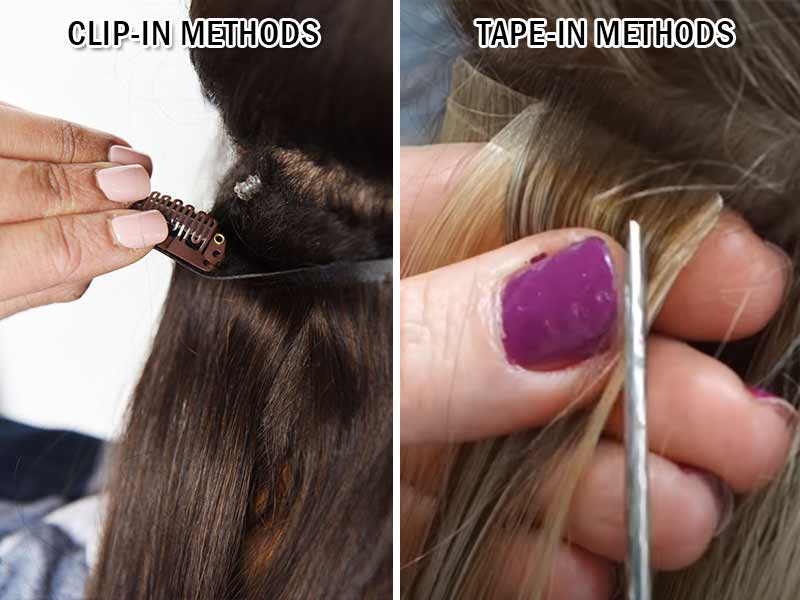
Tape-in method
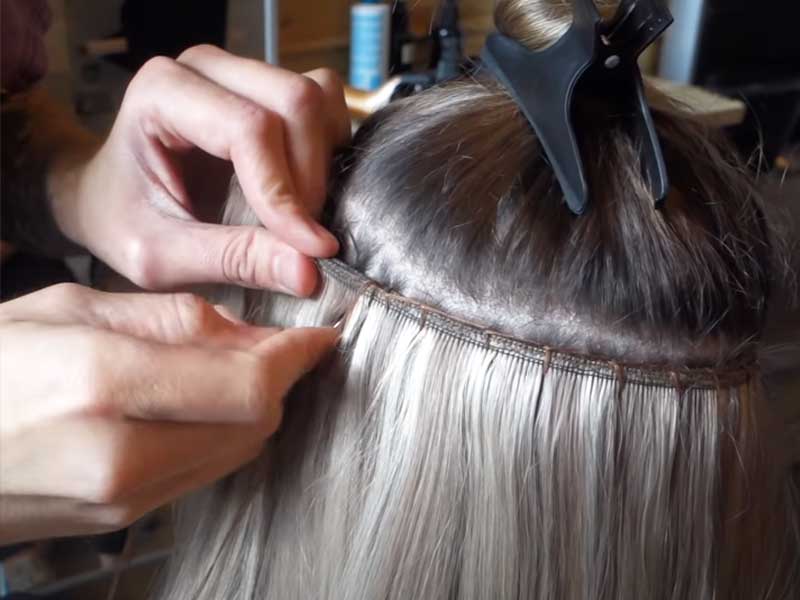
The Tape-in method involves using double-sided tape attached to one side of the hair bundles/hair weave. There are 3 types of tapes, namely classic tape-in, invisible tape-in, and stitched tape (a new type of tape that comes with one or two stitching lines help to provide more security for installation). To put in hair extensions using the tape-in method, divide your hair and determine where the extensions will go, lift a small section of hair, then tape a hair bundle under and one over it like a “sandwich”. Press the tape-ins to make sure it stays firm. Do not wash your hair after 48 hours of installation.
This easy method certainly comes with some benefits. First, it is a fast method of application, just after 10-30 minutes, you can have a longer and thicker look. Moreover, it’s reusable and you can use it up to 8 weeks with proper care. Plus, there is no heat are needed to use this style.
There are also some drawbacks of the tape-in method. You cannot wash it soon after applying, so it may provoke excess sweat. The reason is that the tapes take time to secure and adhere firmly to your hair. Any silicone or oil-based products must be limited since they can loosen the bonding. Some kinds of tape can be very messy when re-installation.
Glue bonding method
The glue-in method is mostly used for weave, skin weft extensions, keratin hair extensions ( use the hot gun for bonding).
Normal glue-in method
How to put in hair extensions with normal glue? To apply hair extensions with normal glue, apply glue to the base of the weave or skin weft extensions and attached them to the hair.
The benefit of this is that it is suitable for those who want to use extensions for a short amount of time without removing it while sleeping. And this can be considered as the cheapest form of hair extensions.
The weakness of this method is that glue can trigger damage to your natural hair if it is not applied or removed properly. Besides, it also limits styling options.
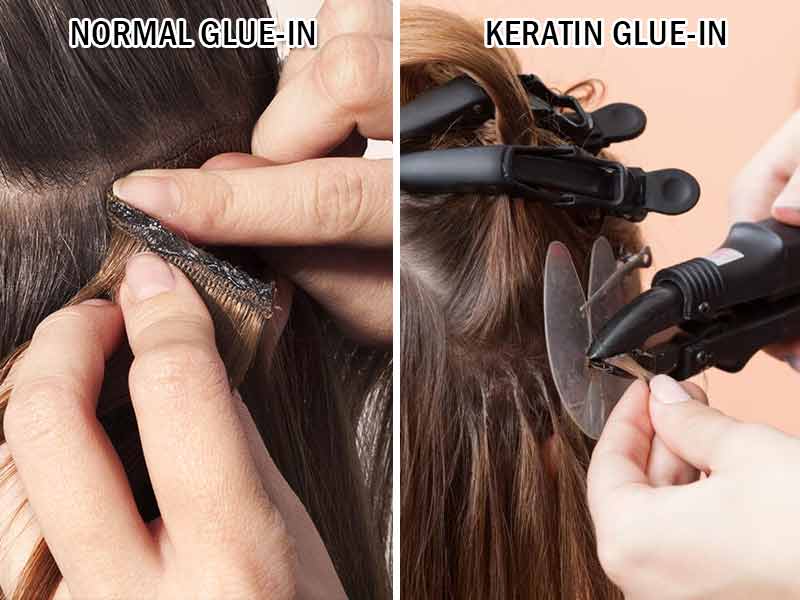
Keratin hair extensions
This kind of extensions will be installed on by one, Select some strands of your hair, hold the extensions against your hair heating the keratin near the root to make a bond that attaches it.
The biggest advantage of this form is that it can last up to six months. It requires low maintenance and it is hard to be noticed by people.
The downside of this method is that it can damage your hair if installed incorrectly. It also takes time to apply. So we recommend you to have hair professional to have you finish your look with keratin hair extensions.
Read more:
- How To Make Clip In Hair Extensions? (With Pictures)
- What Is Remy Hair? The Explicit Way To Define It!
- A Smart Look At What Virgin Remy Hair *Really* Does In Our World
Microbeads using method
Extensions using this method are known as old fusion hair extensions, microbead extensions, or micro-ring extensions. How to put in hair extensions with microbead? This method uses a tiny bead to lock your real hair with a small bundle of extensions. To apply, simply slide your hair through a loop clamping the micro-ring by a pair of pliers.
The very first advantage of microbeads using method is that it requires no heat and glue but still giving you the desired result. It is hard to detect since it will ensure a seamless and natural look. And last but not least, it can last up to 6 months.
The downside of this method is that it is not for unhealthy or weak hair. It can cause tension or headache in the first week.
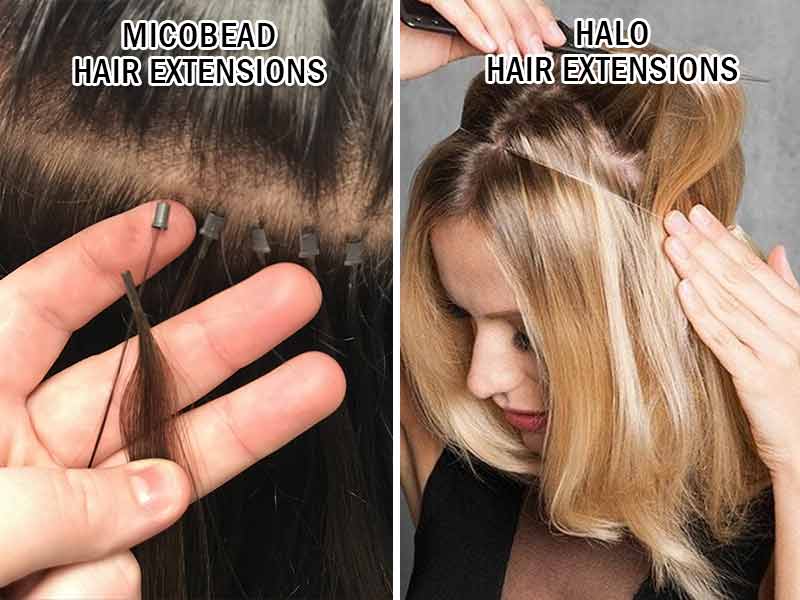
Halo hair extensions
These extensions come with a new method of installation. It is put in your hair with the assistance of an invisible wire.
The outstanding benefit of Halo hair extensions is that it requires no heat, glue, adhesive, or any metallic attachment. This method is quick and easy to apply or remove. It causes no itchy feeling or any kind of pain and tension.
The drawback of this form is that it is not suitable for going swimming and sleeping. Plus, it is hard to style hair involving “updo” styles.
Final words
That’s all about how to put in hair extensions in different ways. In each method, we have provided you some major common benefits and drawbacks of it. Hopefully, after reading this article, you can choose the best extensions for yourself.
If you have any further questions, feel free to drop us a line!
Do not forget to follow Lewigs blog and online store for more interesting things!
