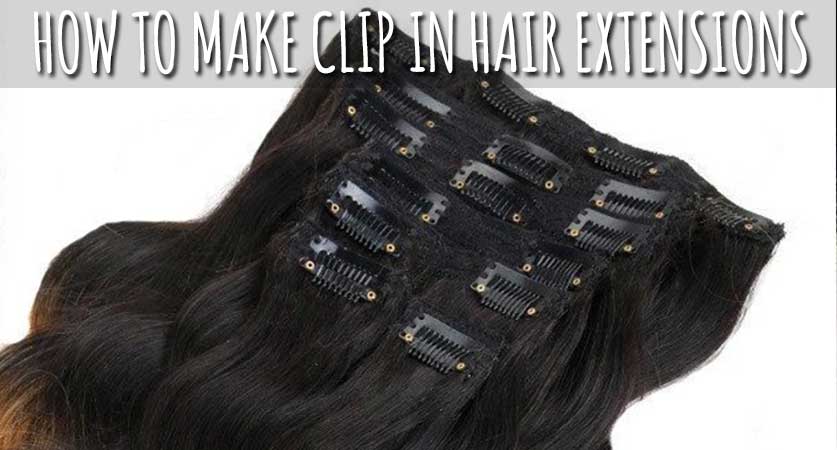
You want to achieve a full and gorgeous look in just a couple of minutes, there is nothing like clip in hair extensions that can meet that requirement. It is easy to install and remove, and it is reusable, so clip-in hair extensions are perfect for those who don’t want to wear hair extension all day long but just use it temporarily. Moreover, making a clip in hair extension is much easier than any type of extensions. Hence, if you are kind of a “do it yourself” person, let us show you how to make clip in hair extensions.
What is clip in hair extensions?
Clip-ins are extensions that are installed to the real hair by the clips attached to their hair wefts. The clips are removable anytime you want so they are great for short-term use.
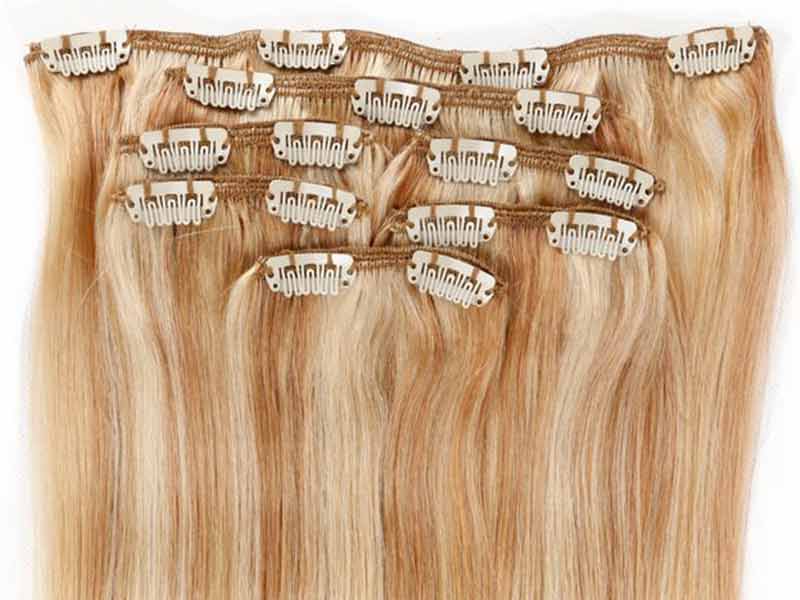
Table of Contents
How to make clip in hair extensions at home?
What you will need
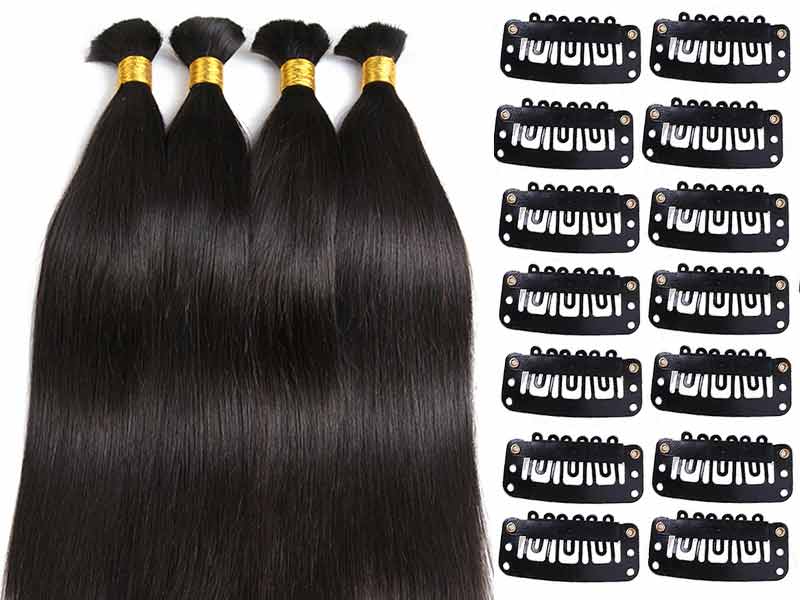
Hair wefts/ bundles
Hair Bonding Glue
Wig Clips (15-20 clips, it depends on the number of hairpieces you are going to use. But it is better to get extra clips if you do not want to make a trip to beauty store one more time)
Sharp Scissors
Needle
Invisible Thread
Measuring Tape
Sewing Machine (optional because you can 1-2 packets of synthetic hair, on a weft by hand)
How to make your own clip in hair extensions?
Step 1: Choosing hair bundles
There are 2 main types of hair bundles, namely human hair bundles and synthetic hair one. If you want your hair to look real, we recommend human hair products.
Choose the hair bundles with color that match your natural color as closely as possible. Remember that, if you buy human hair, you can dye it if doesn’t blend well with your natural hair color, but you cannot do that with synthetic hair. Then consider the length of hair as you want, measure from your ear downward, it is the place where the lowest piece will fall.
Step 2: Measure
Measure the width of the places where your clip in extensions are going to with the measuring tape. When finishing measuring, reflect the measurements onto your hair wefts/ bundles and then cut each hairpiece according to the length you desire with the sharp scissors.
Read more:
- I Tried Hair Topper Without Clips And It’s Brilliant!
- 6 Awe-Inspiring Ideas To Make The Best Use Of Wig Clips
- A Startling Fact About Remy Clip-In Hair Extensions Uncovered
- How Long Do Hair Extensions Last? Let’s Figure It Out!
- Top 4 Most Reliable Human Hair Weave Brands In Vietnam
Step 3: Double Weft
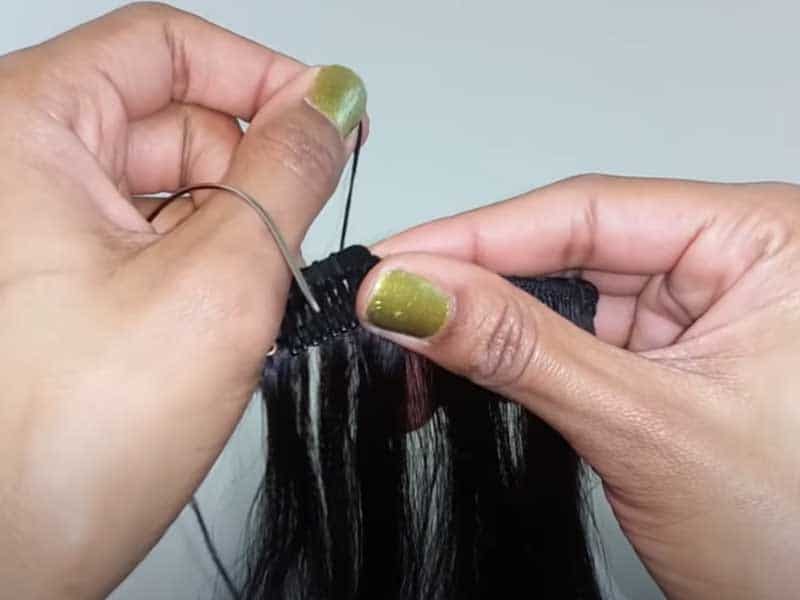
Having a double weft will enable you to secure the clips to the clip-in extensions. There are 3 methods to do so. The first way is to use hair bonding glue to double the wefts together. The second choice is to use a needle and thread to do so. Gather 2 pieces of hair wefts, start sewing with the threaded needle from the end of the weft. The third option is to use a mini sewing machine to attach two wefts together.
Step 4: Attach the clips
Each wig clip comes with small holes embedded in them, which enable the needle and thread get through to secure them on the tracks Using your needle and invisible thread to sew at least 3-4 clips on each weft ( one at each end, one or two at the center) to ensure the wefts will stay firm on your head after you apply them. You can use glue on the back of each lip for extra security.
That is all about making clip-ins, you all can do it yourself at home.
Step 5: Apply the Clip-ins
Flip your natural hair to the other side and start to clip the weft in place. Then, pull your natural hair back down and finish!
Ensure that all the clips are tight! Do not hesitate to wear them outside or adjust them until you think they stay firm. Run through your hair with a soft brush to see how natural it is.
Style your hair in a secure hairstyle and let’s enjoy your new look!
How to take care of your clip-ins hair extensions?
You put a lot of effort and love when making your own clip-ins so of course, you want to protect it as much as possible. Here are some tips for you to take care of them:
Gently brush
Gently brush your hair with clip-ins. Brushing before and after wear it is a should! So start gently brush from the bottom to detangle and then move upward and do the same.
Wash and condition your clip-ins
Remove it when you don’t use it. And We recommend you wash it when it separate from your hair. Use a mild and sulfate-free shampoo to wash it. You do not need to rub it harshly, just smoothly run your fingers through the hair.

Condition your clip in hair extension after cleansing it to make it softer. And let it air dry instead of using a hairdryer.
Wear a swimming cap
When you go swimming, it is a must to wear a swimming cap to protect your clip-ins from salt and chlorine that can damage your extensions.
All in all
A clip in hair extension will never let you down. It is considered as the easiest way for you to gain length, volume, and beautiful hairstyles. You absolutely can make it yourself without any help from hairstylists. It also is one of the most money-saving extensions. If you want a temporary look, clip-in will be the best option.
Hopefully, after this post, you can learn more about how to make clip in hair extensions that look real.
If you want to buy human hair bundles to make your own clip in hair extensions, visit Lewigs right now. Here we will provide high-quality hair wefts that made of 100% Vietnamese and Cambodian human hair. So, you don’t need to worry about the quality and lifespan of our products when you shop at our store. With human hair, you can freely style your extensions in the way you desire. Feel free to drop us a line anytime you have any questions! We’re glad to hear from you!
If you like this article, share it with your mates, and don’t forget to follow Lewigs blog for the more useful information!
Thank you for your time!
